Remote Control of the Arduino board over Bluetooth, using USB Host Shield.
Components needed:
| ITEM | PRICE |
|---|---|
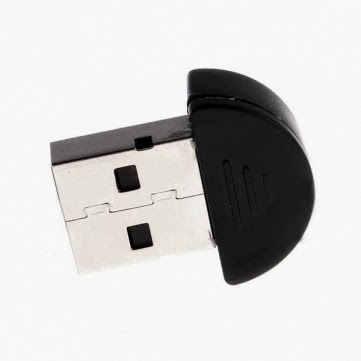
| [Bluetooth Dongle](https://www.amazon.com/gp/search/ref=as_li_qf_sp_sr_tl?ie=UTF8&tag=techblog094-20&keywords=Bluetooth Dongle&index=aps&camp=1789&creative=9325&linkCode=ur2&linkId=27e3bf8739806f5a9068da00041d4650) | $10.00 |
| USB Host Shield | $15.00 |
USB Host Shield will allow the Arduino board to communication with various USB devices.
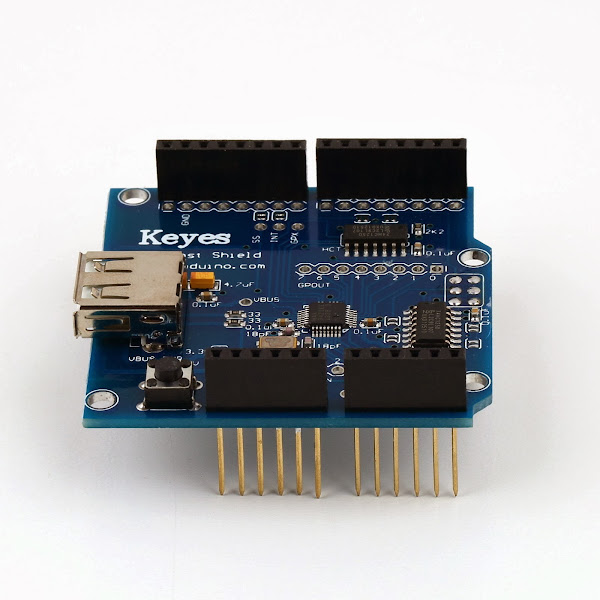
To setup bluetooth communication, all you need to do is to plug in a bluetooth dongle into the USB port on the shield. With some simple code, you can now send commands to the board from any bluetooth enabled device, like a cellphone or a laptop.
USB Host Shield 2.0 library provides some excellent examples on what you can do with the shield. We are interested in the code for SPP (”Serial Port Profile”) Bluetooth protocol. Make the library available to your Arduino IDE as per instructions provided on the library page. The example code, which comes with the library, will initialize the Bluetooth dongle and send a “Hello from Arduino” message to the Bluetooth device that connects. After that, all data received by Arduino through BT connection will be echoed back.
#include <SPP.h>
USB Usb;
BTD Btd(&Usb); // You have to create the Bluetooth Dongle instance like so
/* You can create the instance of the class in two ways */
// This will set the name to the defaults: "Arduino" and the pin to "1234"
SPP SerialBT(&Btd);
// You can also set the name and pin like so:
//SPP SerialBT(&Btd, "Lauszus's Arduino","0000");

boolean firstMessage = true;

void setup() {
 Serial.begin(115200);
 if (Usb.Init() == -1) {
   Serial.print(F("\r\nOSC did not start"));
   while(1); //halt
 }
 Serial.print(F("\r\nSPP Bluetooth Library Started"));
}
void loop() {
 Usb.Task(); // The SPP data is actually not send until this is called, one could call SerialBT.send() directly as well

 if(SerialBT.connected) {
   if(firstMessage) {
     firstMessage = false;
     SerialBT.println(F("Hello from Arduino")); // Send welcome message
   }
   if(Serial.available())
     SerialBT.write(Serial.read());
   if(SerialBT.available())
     Serial.write(SerialBT.read());
 }
 else
   firstMessage = true;
}
This is an great way to test your connection. I used BlueTerm and BlueSerial to test the connection between my Android phone and the board. You could also use your computer as a Bluetooth client with PuTTY. Here is the Arduino code that listens for commands from the Android phone and turns the relay on/off based on the command it receives. The relay signal wire is connected to pin 8 of the board.
#include <SPP.h>
#include <usbhub.h>

USB Usb;
USBHub Hub1(&Usb); // Some dongles have a hub inside
BTD Btd(&Usb); // You have to create the Bluetooth Dongle instance like so
/* You can create the instance of the class in two ways */
// This will set the name to the defaults: "Arduino" and the pin to "1234"
SPP SerialBT(&Btd);
// You can also set the name and pin like so:
//SPP SerialBT(&Btd, "Lauszus's Arduino","0000");

boolean firstMessage = true;
char inputChar;
String btIncomingMsg = "";
int deviceControlPin = 8;

void setup() {
 pinMode(deviceControlPin, OUTPUT);
 Serial.begin(115200);
 if (Usb.Init() == -1) {
   Serial.print(F("\r\nOSC did not start"));
   while(1); //halt
 }
 Serial.print(F("\r\nSPP Bluetooth Library Started"));
}
void loop() {
 Usb.Task(); // The SPP data is actually not send until this is called, one could call SerialBT.send() directly as well

 if(SerialBT.connected)
 {
   if(firstMessage)
   {
     firstMessage = false;
     // Send the current relay state to the client
     String stateMsg = BuildStateMsg();
     SerialBT.println(stateMsg);
   }

   if(SerialBT.available())
   {
     inputChar = SerialBT.read();
     Serial.write(inputChar);
    ProccessIncomingData(inputChar);
   }
 }
 else
 {
   firstMessage = true;
 }
}

//recognize received commands and act on them
void ProccessIncomingData(char inputChar)
{
   //each command end with semicolon
    if (inputChar == ';')
     {
       if (btIncomingMsg=="on")
       {
         Serial.write("turning lamp on\n");
         digitalWrite(deviceControlPin,HIGH);
       }else if (btIncomingMsg=="off")
       {
                 Serial.write("turning lamp off\n");
                 digitalWrite(deviceControlPin,LOW);
       }
       btIncomingMsg = "";
       Serial.write("Debug: Clearing btIncomingMsg");
     }
     else
     {
       btIncomingMsg.concat(inputChar);
     }
}

//build a message to notify the client about the current relay state
String BuildStateMsg()
{
     String relayPinState = digitalRead(deviceControlPin)==HIGH?"on":"off";
     return "relay_state:"+relayPinState+";";
}
BlueSerial is OpenSource and available on GitHub. I used BlueSerial’s source code as a starting point when building my own Arduino Control app. I kept the same Homescreen activity, that allows you to select a bluetooth device with which to connect, and I replaced MainActivity with my custom ArduinoControl activity. ArduinoControl has only one toggle button on it that controls the relay state. The toggle button on ArduinoControl activity simply sends “on;” and “off;” messages based on the state of the toggle button:
        mToggleBtn = (ToggleButton)findViewById(R.id.toggleButton);

        mToggleBtn.setOnClickListener(new View.OnClickListener() {
            @Override
            public void onClick(View arg0) {
                String msg = "";
                msg  = mToggleBtn.isChecked()?"on;":"off;";
                Log.d("arduino",msg);
                try {
                    mBTSocket.getOutputStream().write(msg.getBytes());
                } catch (IOException e) {
                    // TODO Auto-generated catch block
                    e.printStackTrace();
                }
            }
        });
A parallel thread is responsible for receiving the data from Arduino. At this point, there are only two messages about the state of the relay that we expect to receive right after the connection is established:
- relay_state:on;
relay_state:off; private class ReadInput implements Runnable {
    private boolean bStop = false;
    private Thread t;

    public ReadInput() {
        t = new Thread(this, "Input Thread");
        t.start();
    }

    public boolean isRunning() {
        return t.isAlive();
    }

    @Override
    public void run() {
        InputStream inputStream;

        try {
            inputStream = mBTSocket.getInputStream();
            while (!bStop) {
                byte[] buffer = new byte[256];
                if (inputStream.available() > 0) {
                    inputStream.read(buffer);
                    int i = 0;
                    for (i = 0; i < buffer.length && buffer[i] != 0; i++) {
                    }
                    final String strInput = new String(buffer, 0, i);
                    Log.d("arduino", strInput);

                    if (strInput.equalsIgnoreCase("relay_state:on;\r\n"))
                    {
                        toggleOn(true);
                    }else if (strInput.equals("relay_state:off;\r\n"))
                    {
                        Log.d("arduino","Set toggle button off");
                        toggleOn(false);
                    }
                    else
                    {
                        Log.d("arduino","Couldn't recognize:"+strInput);
                    }
                }
                Thread.sleep(500);
            }
        } catch (IOException e) {
            e.printStackTrace();
        } catch (InterruptedException e) {
            e.printStackTrace();
        }

    }

    public void stop() {
        bStop = true;
    }
}

private void toggleOn (final boolean isOn)
{
    runOnUiThread(new Runnable() {
        public void run() {
            mToggleBtn.setChecked(isOn);

        }
    });
}
Download Android App code. NOTE: USB Shield works out of the box on Arduino Uno. For Arduino Mega 2560, jumper together the following pins:
- 52->13
- 50->12
- 51->11
- 53->10